|
| Counter tiles are marked with this diamond symbol |
The Counter flag is very useful to put on impassable tables, benches, fences, walls, etc. The main purpose of it is to allow the Player to trigger an Event that is on the other side of this tile (not immediately adjacent to the Player).
This is how you can talk to shop keepers or inn keepers who sit behind some sort of bench or counter.
It only works when there is
one Counter tile between the Player and the Event. So in the above image, the NPC on the right will
not talk to you from the front, but
will talk to you from the left or right.
Another function of the Counter flag to watch out for is that,
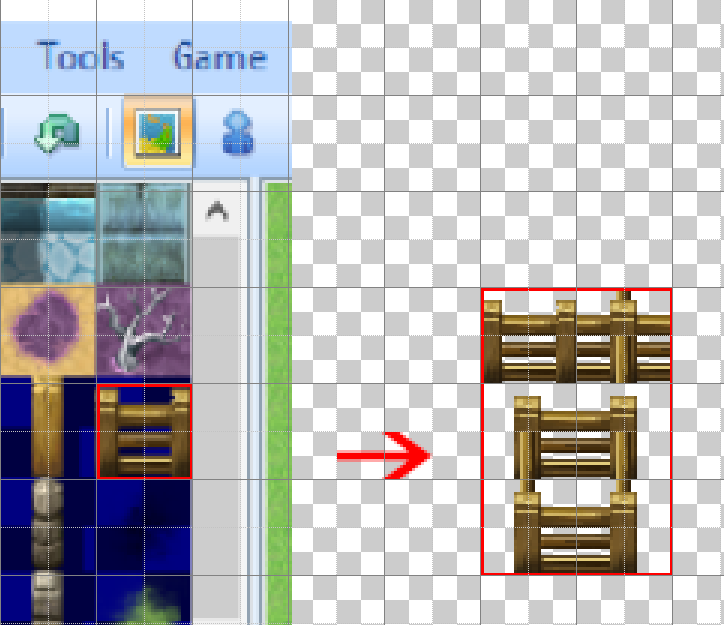
on A2 Auto Tiles, the Counter flag changes the way RPG Maker draws those tiles.
 |
| Counter flag OFF |
 |
| Counter flag ON |
With the Counter flag ON, the front of the tile extends downwards into the squares below it by 8 pixels.
The Auto Tile is still made up in the same 2x3 pattern, RPG Maker just puts them together a little differently.
 |
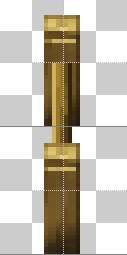
| Normally, the top 16 pixels and the bottom 16 pixels are put together to create the front of the tile. |
 |
| But when the A2 auto tile has the Counter flag ON, it's the top 24 pixels and the bottom 16 pixels that get put together, with the bottom 16 pixels being moved down into the below square by 8 pixels. |
This is the only difference. It only affects the front or bottom edge, allowing the Player to look like they are standing closer to the counter. Everything else about how the Auto Tile is put together is the same, which makes this useful for A2 counter tops, but not so useful for A2 fences.